Account Info overview (view statements and transactions, create account information reports)

Document ID: 760
Modified: 12/10/2022
Account information overview - How to access

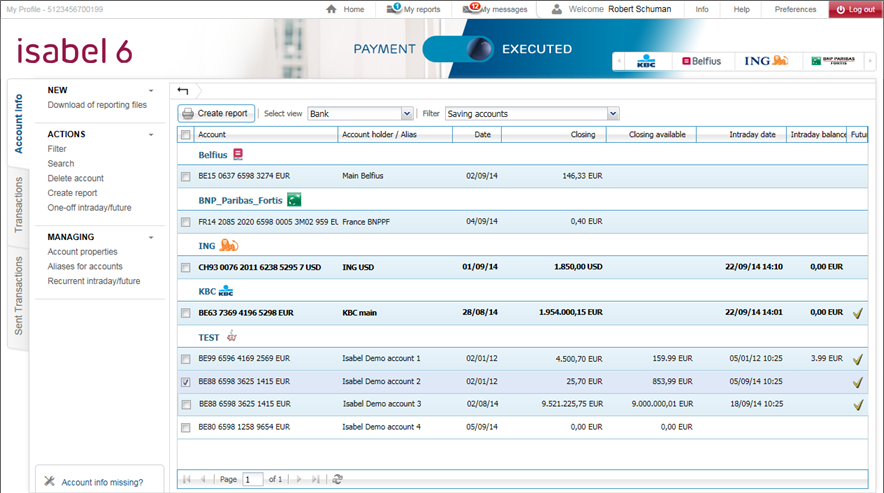
To access and view your account information, click on the tab Account info.


Organize and customize your account information overview
Sort, add or remove columns

You can add or remove columns by going to the header of the column with your mouse and clicking on the arrow down button to display the ability to sort the column and remove/add columns.

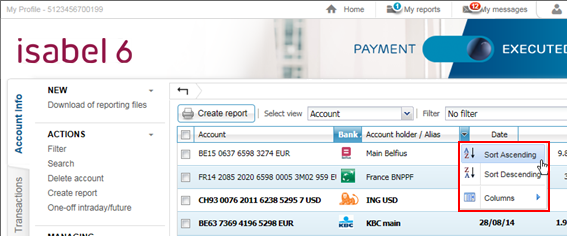
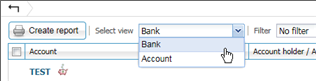
Note: sorting will be disabled if the view is set to Bank, or view totals is active. To modify the sorting, first change the view to Account, and disable view totals.

How to show totals in your account info

How to show totals in your account info?  

  1. Start Isabel 6 and go to the Account Info tab.
  2. First create a filter if necessary. If you want to show the totals of certain accounts only in Isabel 6 and not of all your accounts, you should first create a filter and apply it to all your accounts. How to create a filter?
  3. Tick ‘Show totals’ in the bar above the Accountinfo screen. You can then directly see all (sub)totals  and print the balances of all your accounts per bank and per currency.

Switching to another filter
  1. Go to the tab Account info.
  2. Click on the Filter dropdown list to display the available filters.
  3. Choose the desired filter.
    Note: "Not yet consulted filter" will be by default available.

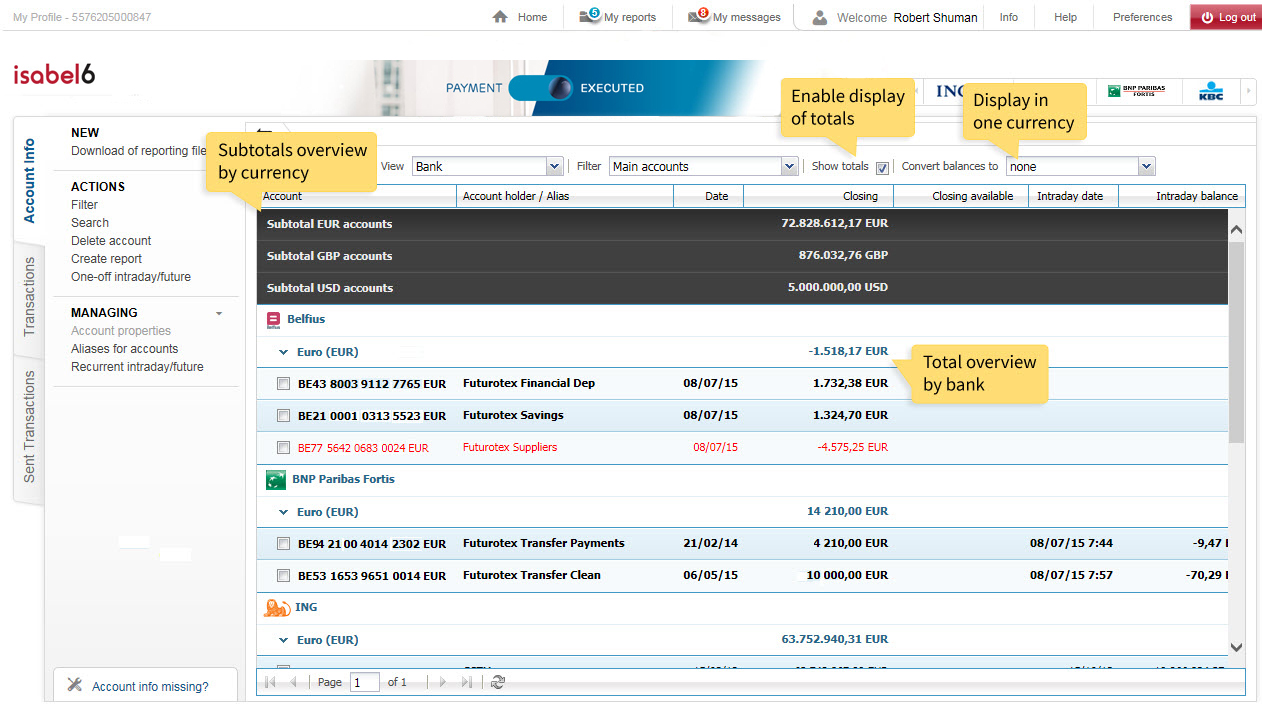
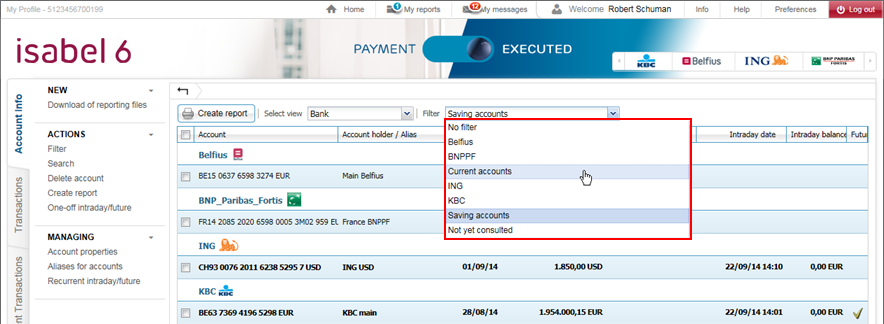
TIP: you can choose a default startup filter every time you access Account Info.

Consulting and browsing through statements and transactions
Consult the details of an account (view your statements)

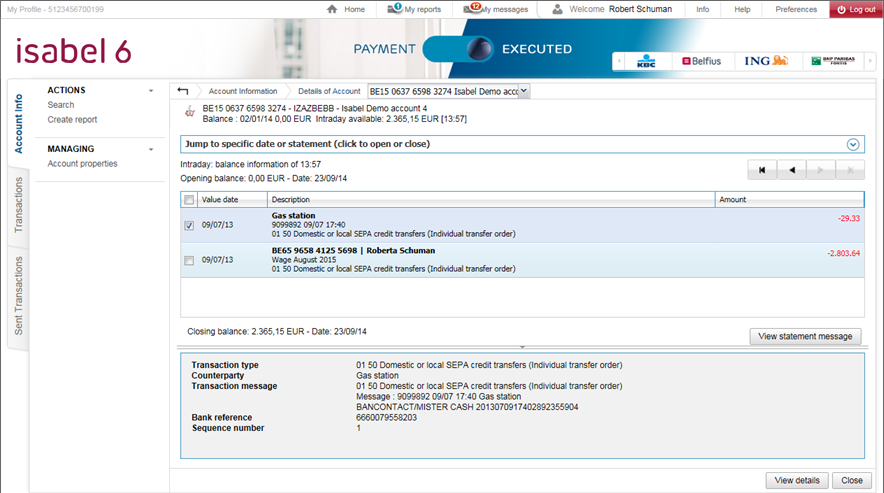
To view the details of an account, from the overview of account information, click on the bank account of which you want to view the details..

Depending on the default view of account information (which can be set in Preferences > Account info) you will see:

The details of the latest booked statement.

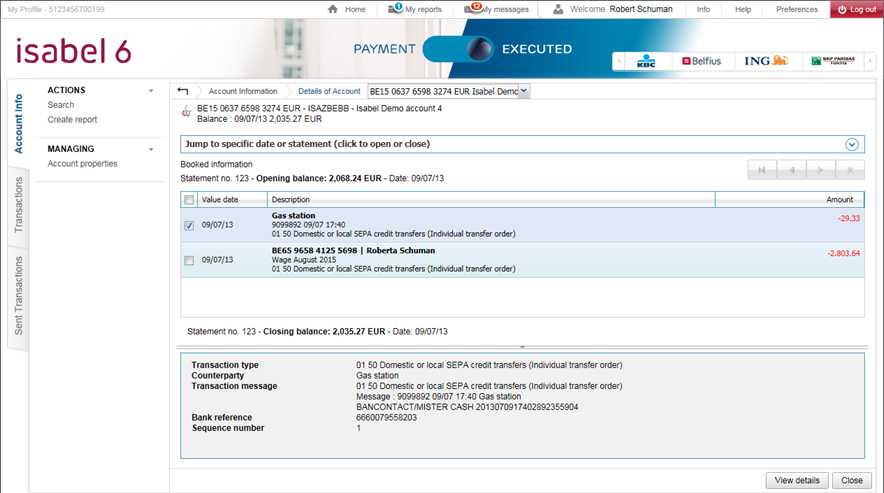
All the transactions for the latest available period.

By clicking on a transaction, you can:

  • Consult the details of a transaction
  • Create a report of the statement you are currently viewing
  • Create a report of (a) transaction(s)
Consult the details of a transaction


  1. From the details of an account (see Consult the details of an account (view your statements)), navigate to the statement that contains the desire transaction (see Go to / jump to a specific statement or value date).
  2. Click on the transaction to view the details for that transaction.

From here you can create a report of a specific transaction.

Go to / jump to a specific statement or value date

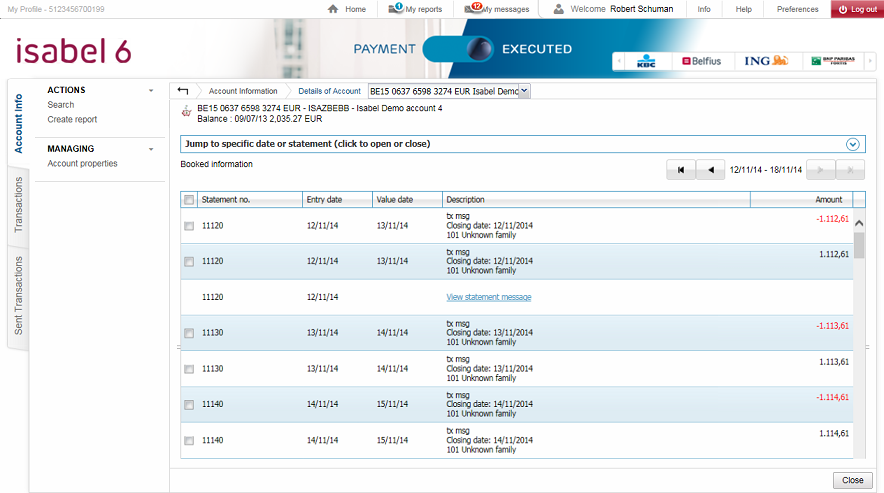
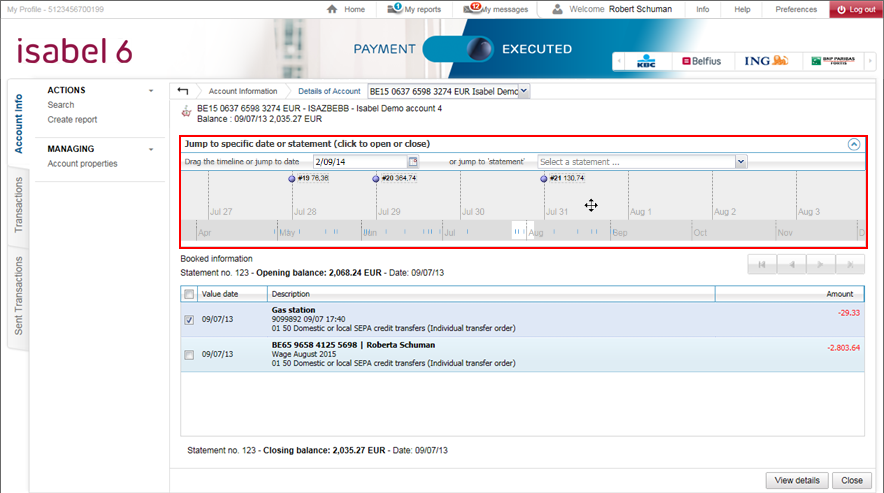
From the details of an account (see Consult the details of an account (view your statements)), click on "Jump to specific data or statement" to display a timeline. Using this timeline you can jump to a specific date in the past or specify a specific statement.

Consult intraday and future day


  1. Go to the tab Account info.
  2. In the columns Intraday date, Intraday balance and Future you can view if new data is available for you

  3. To view the details, open the details of the account and click on the right arrow ► to view the next statement. The right arrow ► will only be active if intraday or future info is available.
    In this window you can view:
    • If it is regarding Intraday or Futureday
    • At what time the Intraday or Future info was generated by your bank
    • The details of the Intraday or Futureday transactions


    Note: Some banks send a free message if no Intraday was available when the request was processed. As a result no transactions will be listed, but a free message can be consulted by clicking on View attached info (as shown below).

Creating reports

Selecting your accounts

  • When specific accounts are selected: only the selected accounts appear on the report.

  • When no accounts are selected: all accounts in the active filter appear on the report.

  • If the checkbox "all accounts" in the title bar has been checked:
    Active filter : all accounts in your contract profile appear on the report. -- Unchecking the box in the title bar or individual accounts does not  affect your report.
    No filter : all accounts present on the current page appear on the report.

Saving your report preferences

The following parts contain instructions on how to create different types of reports of your account information. You can store any of your configured preferences in this part by simply clicking the 'Save report settings as default' box in the upper right corner. These settings are stored locally on your system, so these will not be preconfigured when you access Isabel from another computer.

Creating specific report types
Balance overview report

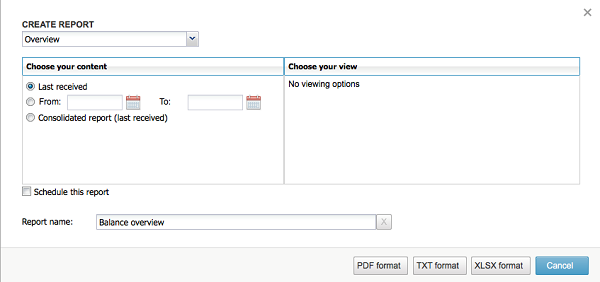
A balance overview report will include an overview of accounts together with the account balance, statement number (if a statement occurred on that day),...

To create a balance overview report:

  1. Go to the tab Account Info
  2. Select the account(s) you want to include in your report. If no accounts are selected, all accounts that are currently visible in your filter will be included in the report.
    TIP: by creating your own filters (example a filter that only includes your savings accounts or accounts from a specific bank) you can quickly create reports that only include the accounts you want.
  3. Click on Create report from the left menu. As a result the Create report window will be displayed.
  4. Make sure Overview is selected from the dropdown list.
    • Last received: will create a report with an overview of the last receive balance information.
    • From - To: will create a report with an overview of the balances that were available on and between the days specified for a maximum of 3 months.
      TIP: To have an overview of the account balances on a specific day in the past (example balance information on 1 January 2014), set the From and To date on the same date (example 01/01/2014).
  5. You can change the name of the report by changing the text in the field "Report name".
  6. Click on PDF format, TXT format or XLSX format to request your report.
  7. A message (in the right corner) will briefly appear to notify you that the report has been requested. Once the report is finished, you can download it from "My Reports".
All statements between two dates

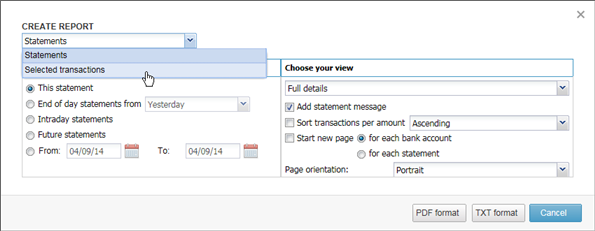
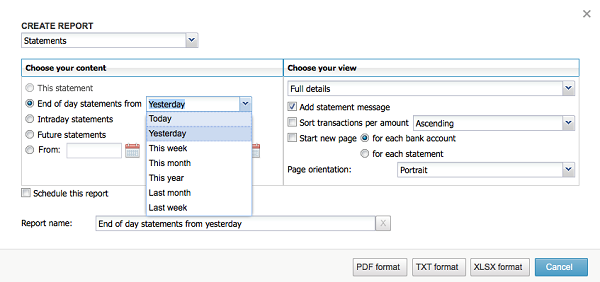
A statement report will include the details of all statements (and the transactions) of the statements you specify.

To create your statement report:

  1. Go to the tab Account info.
  2. Select the account(s) you want to include in your report. If no accounts are selected, all accounts that are currently visible in your filter will be included in the report.
    TIP: by creating your own filters (example a filter that only includes your savings accounts or accounts from a specific bank) you can quickly create reports that only include the accounts you want.
  3. Click on Create report from the left menu. As a result the Create report window will be displayed.
  4. Make sure Statements is selected from the dropdown list.
  5. Choose between:
  6. Optionally, you can modify your report layout and content in the "Choose your view" part of the window.
  7. You can change the name of the report by changing the text in the field "Report name".
  8. Click on PDF format, TXT format or XLSX format to request your report.
  9. A message (in the right corner) will briefly appear to notify you that the report has been requested. Once the report is finished, you can download it from "My Reports".
Report of a specific statement

A report of a specific statement will show the details of all transactions that occurred on a specific statement.

To create a report of a specific statement:

  1. Go to the statement that you want to include in the report.
  2. Click on Create report from the left menu. As a result the Create report window will be displayed.
  3. You will notice that "This statement" will be selected by default.
  4. Optionally, you can modify your report layout and content in the "Choose your view" part of the window.
  5. You can change the name of the report by changing the text in the field "Report name".
  6. Click on PDF format, TXT format or XLSX format to request your report.
  7. A message (in the right corner) will briefly appear to notify you that the report has been requested. Once the report is finished, you can download it from "My Reports".
Report of a specific transaction

A report of a specific transaction will show the details of all transactions that occurred on a specific statement.

To create a report of a specific statement:

  1. Go to the statement in which the transaction is located.
  2. Once located, select the transaction(s) you want to include in the report using the checkboxes in the first column.
  3. Click on Create report and make sure to select Selected Transactions instead of Statements (as shown below).
  4. You can change the name of the report by changing the text in the field "Report name".
  5. Click on PDF format, TXT format or XLSX format to request your report.
  6. A message (in the right corner) will briefly appear to notify you that the report has been requested. Once the report is finished, you can download it from "My Reports".
Account Info overview (view statements and transactions, create account information reports)
760
12/10/2022