How to create and manage filters in Account Info

Document ID: 1091
Modified: 08/09/2022

Body:

Purpose of using filters

Using filters can be of great help to organize your account information area the way you want to. A single account can be part of multiple filters. You can create your own custom filters.

Examples:

  • Only your most consulted account
  • By type (savings or current account)
  • All accounts from a specific bank
  • Only your foreign accounts
  • Only with a specific currency
  • By a specific subsidiary
  • ...
How to access

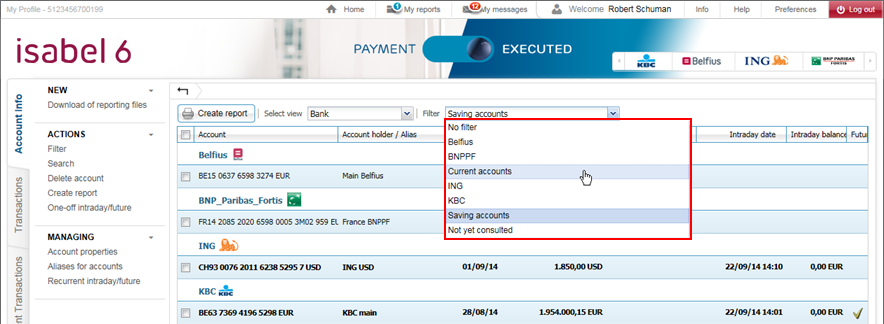
To manage (create, modify or delete) filters, go to the tab Account information and click on Filters in the left navigation menu. If you already have existing filters, you can easily switch between them through Account information.


Depending on the amount of available accounts a different view may appear


When you only have a limited amount of accounts.

When you have a large amount of accounts.

Switching to another filter
  1. Click on the Filter dropdown list to display the available filters.
  2. Choose the desired filter.
    Note: "Not yet consulted filter" will be by default available.

TIP: you can choose a default startup filter every time you access Account Info.


Managing filters
Creating a new filter or modifying one

Creating a new filter or modifying one

  1. Go to the Filter window.
  2. If you want to modify an existing filter, select the existing filter from the dropdown list. The configuration of the existing filter will be loaded.
  3. Select the accounts you want to include in your filter.
    Note: If you only have a limited amount of accounts, you can simply select the accounts you want to include. In case you have a large amount of accounts, you will need to search for the accounts using the Search feature.
  4. Optionally, select a specific currency or type of Account information.
    • Booked: accounts which have booked statements (usually this includes almost all your accounts).
    • Intra Day: accounts that have received Intraday.
    • Future: accounts that have received Future info.
  5. Once your filter is set up, you can:
    • Save your filter by typing a name and clicking Save filter. If you want to modify an existing filter, simply type the same name and press Save filter (a confirmation to overwrite the existing filter will appear).
    • Apply filter will go back to Account info with your filters configuration. Click Filter again to modify or save your filter.
      Note: your filter will be lost if you do not save it.
How to use the Search when setting up filters?

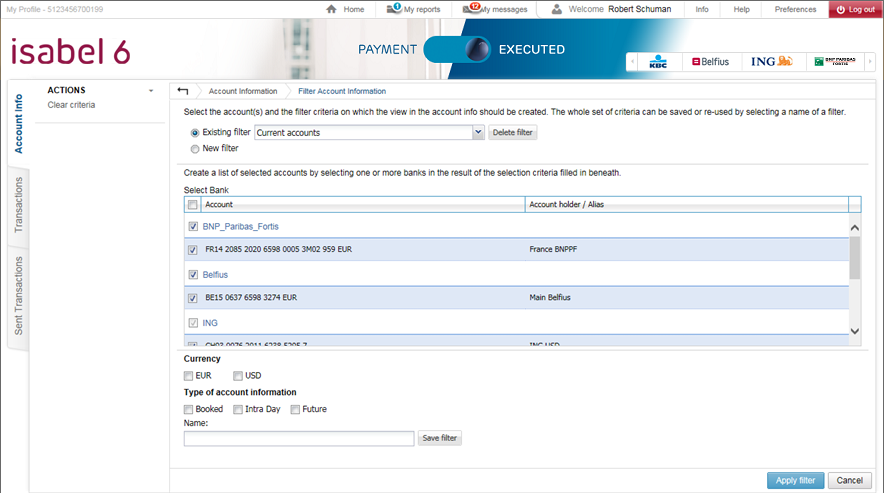
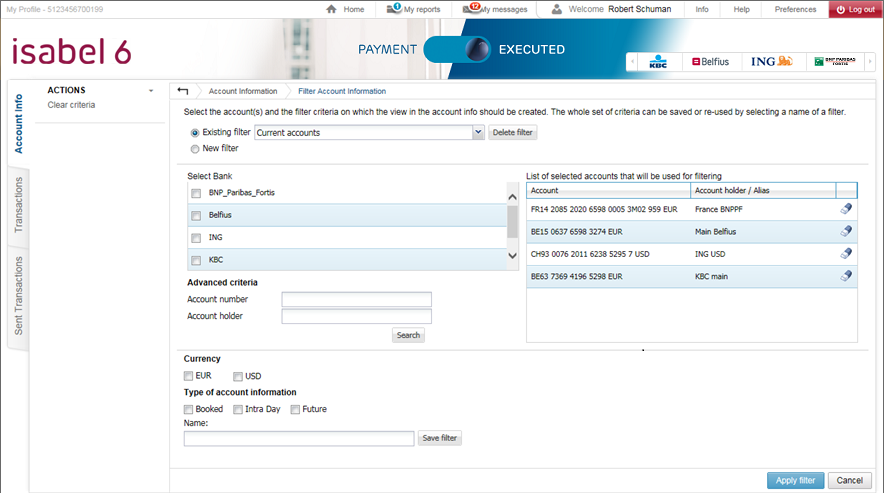
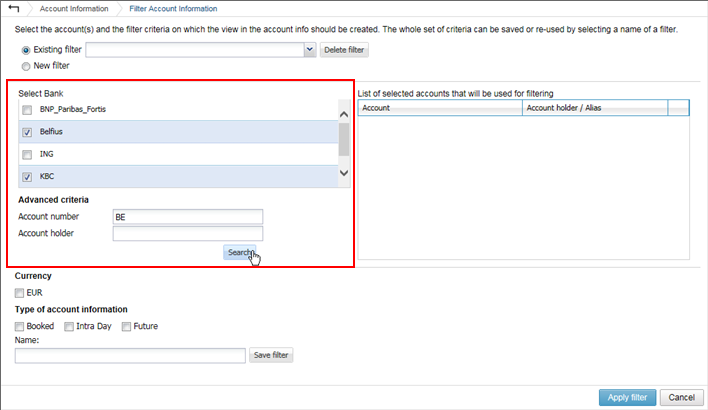
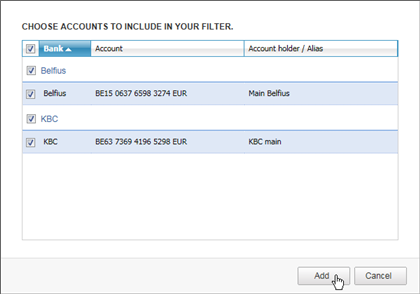
In case you have a lot of accounts, your view will not allow you to simply select your accounts from a list but forces you to search for your accounts.

  1. Select your bank and/or type the account number (when typing the account number, use the same notation as in Account information).

    example: show all Belfius and KBC accounts having BE in the account number.

  2. Click Search to display the list of accounts that corresponds to your search. From this popup, select the accounts you want to add to the filter.

    Accounts that are added to your filter will appear on the right.

  3. Repeat step 3 for all the accounts that you wish to add in your filter
Deleting an existing filter
  1. In the filter window, choose Existing Filter and select the filter from the dropdown list.
  2. Once selected, click Delete filter to remove the selected filter.
    Note: no confirmation will be displayed.
Defining a default filter

Go to the preferences of Isabel 6, choose Account Info and choose your default filter


How to create and manage filters in Account Info
1091
08/09/2022