Before being able to create SEPA direct debits you will need one or more mandates. To create mandates, consult Creating and managing mandates.

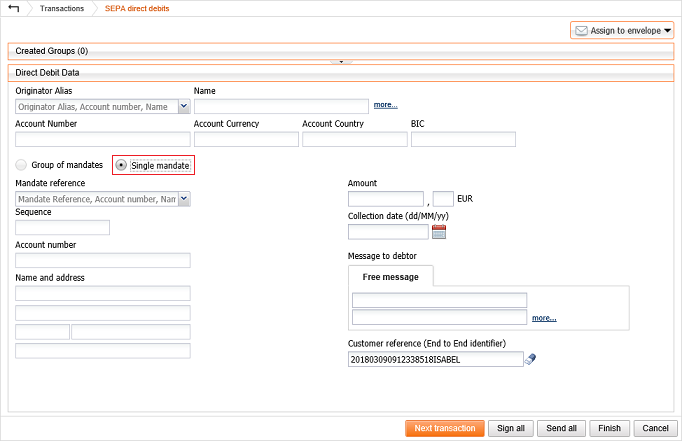
Select the Originator Alias from the list or search by entering the alias or IBAN. All other fields will be automatically filled in.

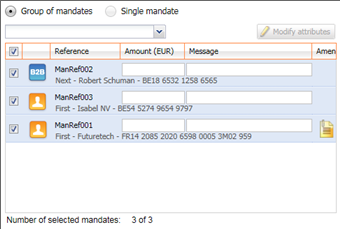
Note: your bank has to only be notified once about an amendment. If you create a SEPA direct debit that includes a mandate with an amendment (illustrated with the icon![]() ) the amendment will automatically be removed from the mandate (not from your newly SEPA direct debit). If you remove the created SEPA direct debit from your transactions before sending it to your bank or the bank rejects the SEPA direct debit, you will need to recreate the amendment. Please also note that the debtor address must be filled in when debtor or creditor account is located in a non-EEA SEPA country.
) the amendment will automatically be removed from the mandate (not from your newly SEPA direct debit). If you remove the created SEPA direct debit from your transactions before sending it to your bank or the bank rejects the SEPA direct debit, you will need to recreate the amendment. Please also note that the debtor address must be filled in when debtor or creditor account is located in a non-EEA SEPA country.
If you have not yet created any groups of mandates, only the option 'Single mandate' will be available (how to group your mandates).


Note: your bank has to only be notified once about an amendment. If you create a SEPA direct debit that includes a mandate with an amendment (illustrated with the icon![]() ) the amendment will automatically be removed from the mandate (not from your newly SEPA direct debit). If you remove the created SEPA direct debit from your transactions before sending it to your bank or the bank rejects the SEPA direct debit, you will need to recreate the amendment.
) the amendment will automatically be removed from the mandate (not from your newly SEPA direct debit). If you remove the created SEPA direct debit from your transactions before sending it to your bank or the bank rejects the SEPA direct debit, you will need to recreate the amendment.
Global debit gives the instruction to the bank to only get the total amount of your SEPA direct debit group when receiving your account information. If this option is disabled every individual collection will be available on your account statements.
Note: Global debit is not available for all banks. If the option is unavailable, your bank doesn't support it.
If you wish to know why your bank has rejected a SEPA direct debit, please subscribe to the module 'Exporting account info' and ask your bank to send CODA for the concerning account. In the received CODA will be a code which will describe why a SEPA direct debit has been rejected (insufficient funds, closed account, ...). For more info on the specific rejection codes, use the following link.