|
|
Open the Isabel Control Panel via Start > Isabel Services > Isabel 6 Control Panel | |||||||
|
|
Open the Isabel Control Panel via Launchpad  . .
|
|||||||
|
Click on the icons below to learn more about their function: |
||||||||
 Install your certificate |
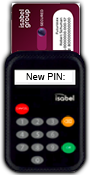
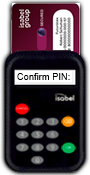
 Change password |
 Version |
 Card Information |
 Support |
 Connectivity Tests |
 CA |
 Restart service (only macOS) |
 Uninstall (only macOS) |